Welcome to my Blog friends ,I write about Drawings And Craft Making Ideas and being a full-time creator You find different tips and tutorials ,Drawings for kids. Is a source of Home Decorating ideas.
Friday, December 22, 2023
Fox Drawing
Christmas Drawings
Christmas Drawings
Christmas is the annual festival celebrating the birth of Jesus Christ (who is believed as their son of their god) , observed primal ire on December 25 as a religious and cultural celebration among billions of people around the world . Here given below are some drawings related to the Christmas Day like Christmas tree or penguins as given below .
Monday, December 11, 2023
How to Draw Parrot
Hello and Welcome back to a another post !
Today we are going to be drawing a parrot with numbers !
Things we need :- A4 Sheet , Pencil , Eraser and Colour pencils .
So let’s get started !
Step 1 :- First , Draw two two’s one small and below it will be big .
Step 2 :- Second , Connect north the two’s to make the side of the parrot .
Step 3 :- Third , Draw the beak of the parrot which should drawn at the face .
Step 4 :- Fourth , Finish the tail of the parrot .
Step 5 :- Fifth , Draw the end of the tree and finish of by colouring the drawing .
And we are with this drawing , So we hope you like the drawing !
Thank you and Have a Great day !
Unicorn Special Drawings
Unicorn Special Drawings
This blogs is all about ……. Unicorns! So , basically this blog is about the drawings of unicorn on various different styles either sleeping , eating , carrying something and many more other things. Given below are many more drawings of Unicorns and feel free to be inspired .Physics Front Page Idea
Creative Physics Front Page Ideas for School Projects
A well-designed front page can make a physics project look interesting and impressive. Since physics is the study of energy, motion, forces, and the universe, the front page should reflect these ideas in a clear and creative way. With simple drawings and neat layouts, students can create an attractive physics project cover.
One common and effective idea is the science tools theme. Drawings of instruments like a pendulum, magnet, battery, bulb, or pulley immediately show that the project is related to physics. Adding labels or arrows can make the design more educational.
Another creative option is the laws and formulas theme. Writing famous formulas such as Newton’s laws of motion, speed = distance ÷ time, or Ohm’s law in neat handwriting gives the front page an academic look. These can be combined with small diagrams to keep the page visually balanced.
Students can also choose a space and astronomy theme. Illustrations of planets, stars, satellites, telescopes, or rockets highlight the connection between physics and the universe. This theme is especially suitable for projects related to light, gravity, or space science.
For a modern look, a minimalist physics design works well. Using clean lines, simple symbols like waves, atoms, or electric circuits, and limited colors keeps the front page neat and professional.
Overall, a good physics front page should be simple, creative, and related to the topic of the project. It should reflect scientific thinking while allowing room for imagination. A thoughtfully designed front page makes the project more appealing and shows a student’s interest in physics.The Branch of Science that deals with the structure of matter. It studies objects ranging from the very small using to the entire universe. It also involves study of its motion and behaviour through space and time .This Front Page Idea is all about physics basically you can see given below like a pendulum , Atomic Structure and many more other that you can see below .
History Project (Front Page Ideas)
History Project
- First up is the front page idea 💡, Here I have the components of History like the Prehistoric Era , the Egyptian Civilisation ( The Pyramids of Giza ) , the Roman Empire , The period when the King ruled and etc.
- Second up is the first page of the project , I have chosen the first constitution member as Sir Nyapathi Madhava Rau and I did research about him and his life and wrote on a A4 sheet and I also toke a picture of him during the time he was alive.
- Third up is the second page of the project , I have chosen the first constitution member as Rajendra Prasad (The President of the Constitution )and I did research about him and his life and wrote on a A4 sheet and I also toke a picture of him during the time he was alive.
English Front page (PROJECT)
ENGLISH FRONT PAGE IDEA
Friday, December 8, 2023
Flower vase Drawings
Flower Vase Drawings
Step-by-Step Guide to Drawing a Flower Vase
Materials You’ll Need:
- Paper
- Pencil (preferably an HB or 2B pencil for sketching)
- Eraser
- Colored pencils or markers (optional for adding color)
Step 1: Sketch the Outline of the Vase
Begin by drawing the outline of your vase. Start with a straight vertical line in the center of your page. This will act as a guide to ensure your vase is symmetrical.
On either side of the line, draw two slightly curved lines going downwards. These lines should resemble the outer edges of the vase. Connect the bottom of these lines with a smooth, curved line to form the base of the vase.
For the opening, draw an oval at the top of the vertical guide. This oval will represent the mouth of the vase.
Step 2: Add Details to the Vase
Now, refine the shape of your vase by adding details. You can decide whether you want a simple vase or a more ornate one with a decorative rim or handles. To draw the handles, sketch two loops or curves on each side of the vase.
Once you’re happy with the shape, erase any unnecessary guide lines to clean up the drawing.
Step 3: Draw the Flowers
Now comes the fun part—adding flowers! Begin by drawing the stems inside the vase, starting from the base and extending upward through the opening. The stems can be straight or slightly curved.
For the flowers, you can draw basic shapes like circles or ovals to represent the heads of the flowers. If you want to draw more detailed flowers like roses or daisies, lightly sketch out the petals one by one. A variety of flowers adds interest and dimension to your drawing.
Step 4: Add Leaves and Foliage
To complete the look, add some leaves and foliage around the flowers. Draw simple almond-shaped leaves along the stems, and vary their sizes for a natural effect. You can also add tiny buds or decorative elements like ferns for more variety.
Step 5: Shade Your Drawing
Shading is what brings your drawing to life. Start by identifying the light source. Decide where the light is coming from, then shade the opposite side of the vase and flowers to create depth.
Use soft, smooth strokes to shade the body of the vase, focusing on areas where the curves naturally create shadows. For the flowers, use light shading for the petals and darker tones for the areas hidden from the light.
Step 6: Add Color (Optional)
If you’d like to bring even more vibrancy to your drawing, feel free to add color using colored pencils, markers, or watercolors. Choose soft, pastel shades for a classic look, or bold, bright colors to create a modern, striking image.
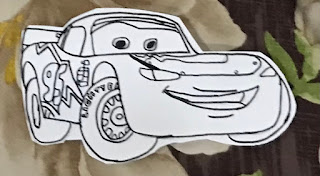
Drawing of Lightning McQueen
Drawing of Lightning McQueen
Sunday, December 3, 2023
Colouring Inspiration
Coloring Inspiration: Bringing a Bird to Life with Colors and Threads
Sometimes, creativity flows when we take a simple coloring template and turn it into something uniquely beautiful. That’s exactly what this project is about: drawing inspiration from coloring sheets and adding personal touches to bring them to life in a vibrant, textured way.
If you're looking for a relaxing and enjoyable activity, try adding your own spin to a pre-made template with colors, textures, or even materials like thread! Here’s how I transformed a simple bird template into a colorful piece of art using a combination of thread art and coloring.
What You’ll Need:
- Coloring Template – You can use a printed bird template or draw your own simple bird outline.
- Embroidery Threads – Grab a few colors like yellow, green, blue, and white for texture.
- Colored Markers or Pencils – Reds, greens, and blues to add depth to the design.
- Glue – To stick threads in place.
- Scissors – To cut the thread.
- Thick Paper or Cardstock – A strong base is ideal to hold the weight of threads and colors.
- Optional Frame – Add a finishing touch by framing your piece.
Step 1: Start with a Simple Bird Template
Whether you’re using a pre-drawn template or one you’ve sketched yourself, begin by printing or outlining the bird. This project can be as simple as coloring inside the lines or as elaborate as adding materials like thread to enhance the design.
- Body and Feathers: The template I used had a lovely bird with flowing tail feathers that begged for some extra flair. Start by lightly coloring the body and outline the feathers.
Step 2: Add Texture with Threads
One of the most fun and creative parts of this project is adding texture with embroidery thread. If you’re feeling adventurous, try this out:
- Feather Threads: Glue colored threads along the bird’s feather lines. I used bright yellows and dark blues to create a 3D effect, layering the thread to mimic real feathers.
- Layer the Threads: You can create depth by using different colors and thicknesses of thread. Start with darker shades for the base and use lighter ones for the highlights.
Don’t be afraid to get creative here! The combination of texture and color really makes the bird come alive.
Step 3: Color the Body and Background
While the threads are drying, take the time to color in the bird’s body and surrounding elements. You can use colored pencils, crayons, or markers — whatever inspires you!
- Body and Wings: I chose darker shades for the body to contrast with the bright threadwork on the feathers.
- Land and Plants: Add some greenery to the background — a few shrubs or grass patches to give the bird a place to stand. It’s a simple addition but adds so much charm to the finished piece.
Step 4: Finishing Touches
Once your threads are set and your coloring is complete, step back and admire your work! If you’re really proud of it (which you should be!), consider adding a border around the paper and framing it to give it a polished look.
Final Thoughts: Color Your Own Way!
This bird template was just a starting point, and that’s what makes coloring so enjoyable — the freedom to add your own twist to a simple idea. Whether you stick to the basics of coloring or go all out with different materials like I did, this project is about letting your creativity guide you.
Feel free to be inspired by this blog and take on this project your way! Whether you draw, color, or even add your own textures, there’s no wrong way to create. You might just surprise yourself with how much fun you have while crafting something beautiful.
Happy coloring and crafting!
Tuesday, June 20, 2023
Beauty of Earth
Beauty of Earth
We live on the most beautiful planet, Earth which is very clean and attractive and nature full of greenery. Nature is our best friend which provides us all the resources to live here. It gives us water to drink, pure air to breathe, food to eat, land to stay, animals, plants for our other uses, etc for our good . We should fully enjoy the nature without disturbing its environment. We should care for our nature, make it peaceful, keep it clean and prevent it from the destruction so that we can enjoy nature forever. Nature is a most precious gift given by the God to us to enjoy but not to harm or destroy.
Thank you and hoped you liked these drawings below !
Tuesday, May 2, 2023
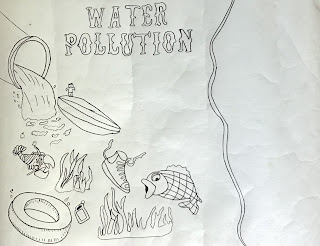
Water Pollution
Water Pollution
Water pollution is the contamination of water bodies by high concentrations of harmful substances which have a detrimental (harm) effect on living organisms and the ecosystem. Substances that create pollution are called as pollutants . There are a lot of ways that create pollution by humans and natural causes .
Some natural causes of water pollution are :
- Volcanos
- Earthquakes
- Agriculture Wastes
- Industrial Wastes
- Domestic Wastes
- Oil Spill
- Mining
- Garbage dumping
- Radioactive wastes
- Eutrophication
- Depletion of Oxygen
- Poisoning of Food Chain
- Death of Aquatic Animals
- Diseases
- Agriculture
- Decantation
- Filtration
- Chlorination
- Boiling
Some methods of prevention of water pollution are :
- Reduction of Waste
- Treatment of Sewage
- Treatment of Industrial waste
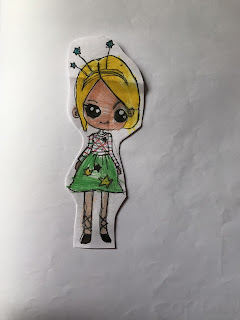
Girl picture Drawings
Girl Picture Drawings
Di


