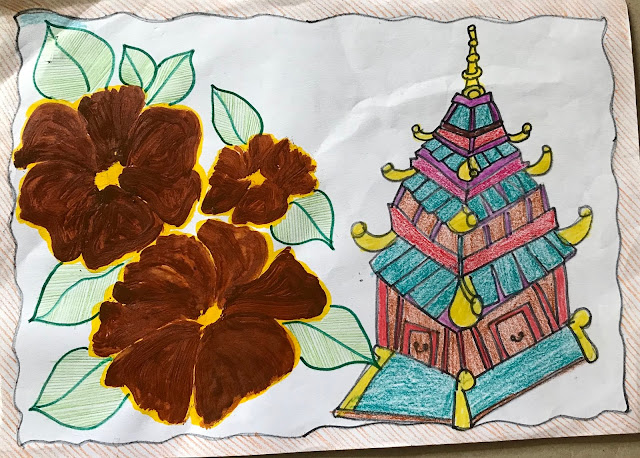
Creating a Vibrant Pagoda and Floral Art: Step-by-Step Drawing Tutorial"
Materials Needed:
- Pencils
- Erasers
- Colored pencils, markers, or paints
- Paper
- Ruler (optional)
Step-by-Step Drawing Guide:
1. Start with the Flower Design:
- Sketch the flowers on the left side of your paper. Begin by drawing rough circular shapes to place the flowers.
- For each flower, draw five large petals. The petals in the image are bold and rounded with slight curves. Start each petal from the center point, making them broad and full.
- Add details to the petals with light curved lines to show the petal texture.
- Sketch leaves around the flowers. Make the leaves oval with pointed tips, adding leaf veins using thin lines.
2. Draw the Pagoda-Style Building:
- On the right side of the paper, draw the basic shape of the pagoda by creating a series of stacked rectangles or trapezoid-like shapes. The shapes should gradually get smaller as you move upwards.
- Each layer of the pagoda has a curved roof. Add these by drawing a curved line extending from each side of the trapezoid base. Then, draw another line underneath to make it thicker.
- Detail the roofs by drawing decorative elements, such as curved roof ornaments. Add more details like stripes and lines inside each section for texture.
- At the top of the pagoda, draw a spire with decorative shapes that resemble stacked beads or ornaments.
3. Add Background Details:
- Incorporate a subtle background behind the pagoda and flowers using light, soft colors like blue for the sky or background. This can be done with watercolors or lightly shading with colored pencils or pastels.
- You can also draw a path or steps leading up to the pagoda by sketching a simple rectangular shape extending from the bottom.
4. Add Color:
- Color the flowers with deep, bold hues like brown or red, as in the image. Use darker shades at the petal edges for depth.
- The leaves can be colored green with light shading to show texture.
- For the pagoda, use bright contrasting colors like pink, green, yellow, and blue. Add shading to create a 3D effect by using darker shades for the roof edges and the sides.
5. Final Touches:
- Go over your lines with a darker pencil, pen, or marker to make them stand out.
- Add finishing touches by carefully applying highlights to parts of the flowers and building to make them appear more realistic or stylized.


No comments:
Post a Comment