Owl
Hello Guys !
Today we are going to be drawing a Owl !
Things we need = Pencil , Pens , colour pencils or crayons 🖍 and paper .
So let’s get started !
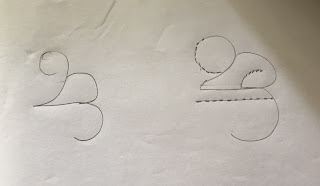
Step 1 : First , Take any size paper and draw a Two twos (one small and one big).
Step 2 : Second , next draw the body and the head of the owl.
Step 3 : Third , then draw some wiggle on the face and the legs of the owl.
Step 4 : Fourth , draw the details of the face like eyes and beak ,also draw the wings.
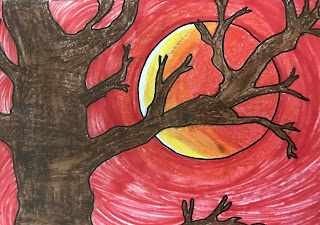
Step 5 : Fifth , outline it and colour it and if want also draw a background .
And we are done with this number drawing , We hope you like it !
Thank you and Goodbye !
Today we are going to be drawing a Owl !
Things we need = Pencil , Pens , colour pencils or crayons 🖍 and paper .
So let’s get started !
Step 1 : First , Take any size paper and draw a Two twos (one small and one big).
Step 2 : Second , next draw the body and the head of the owl.
Step 3 : Third , then draw some wiggle on the face and the legs of the owl.
Step 4 : Fourth , draw the details of the face like eyes and beak ,also draw the wings.
Step 5 : Fifth , outline it and colour it and if want also draw a background .
And we are done with this number drawing , We hope you like it !
Thank you and Goodbye ! Today we are going to be drawing a Owl !
Things we need = Pencil , Pens , colour pencils or crayons 🖍 and paper .
So let’s get started !
Step 1 : First , Take any size paper and draw a Two twos (one small and one big).
Step 2 : Second , next draw the body and the head of the owl.
Step 3 : Third , then draw some wiggle on the face and the legs of the owl.
Step 4 : Fourth , draw the details of the face like eyes and beak ,also draw the wings.
Step 5 : Fifth , outline it and colour it and if want also draw a background .
And we are done with this number drawing , We hope you like it !
Thank you and Goodbye !