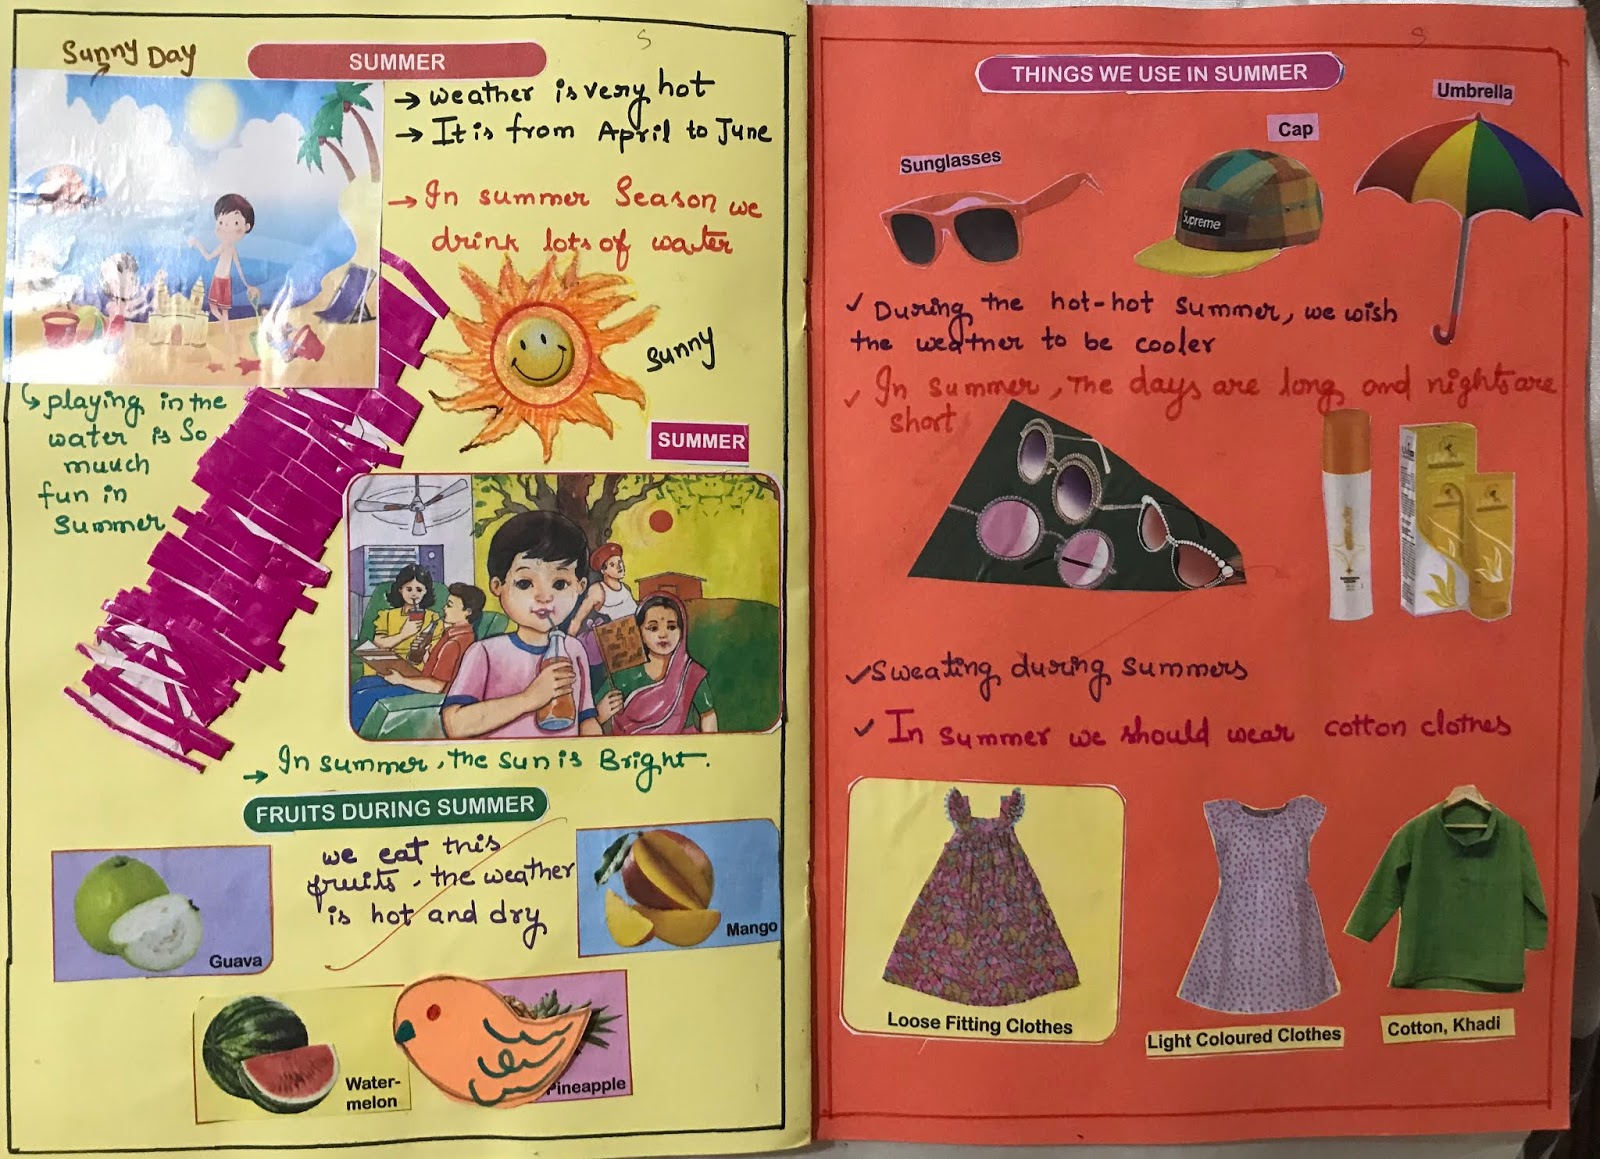
Crochet Stiching Ideas
These are crochet stiching ideas,crochet flowers,laces to attach the sarees,neddle types and models


 |
| Birthday Greeting Card |
 |
| Inside The Card |
 |
| Attach Glitters With glue |
 |
| put the blue dots on anotherside |
 |
| Attach The white Sheet With Trim Edges |
 |
| Stick Pearls on The Greeting |
Air-dry clay / homemade clay / playdough
Golden glitter sheet (for peacock body)
Clay tools or toothpick (optional)
Craft glue
Small black bead or clay dot (for the eye)
White sheet (background)
Place a white sheet or chart paper on a flat table.
This will be the base where your peacock will be arranged.
Cut the peacock’s body shape from a gold glitter sheet.
Include the head, neck, wings and legs in one piece.
Stick the body at the bottom center of the page.
Fix a small black bead or a tiny clay ball on the head for the eye.
Press gently so it sticks well.
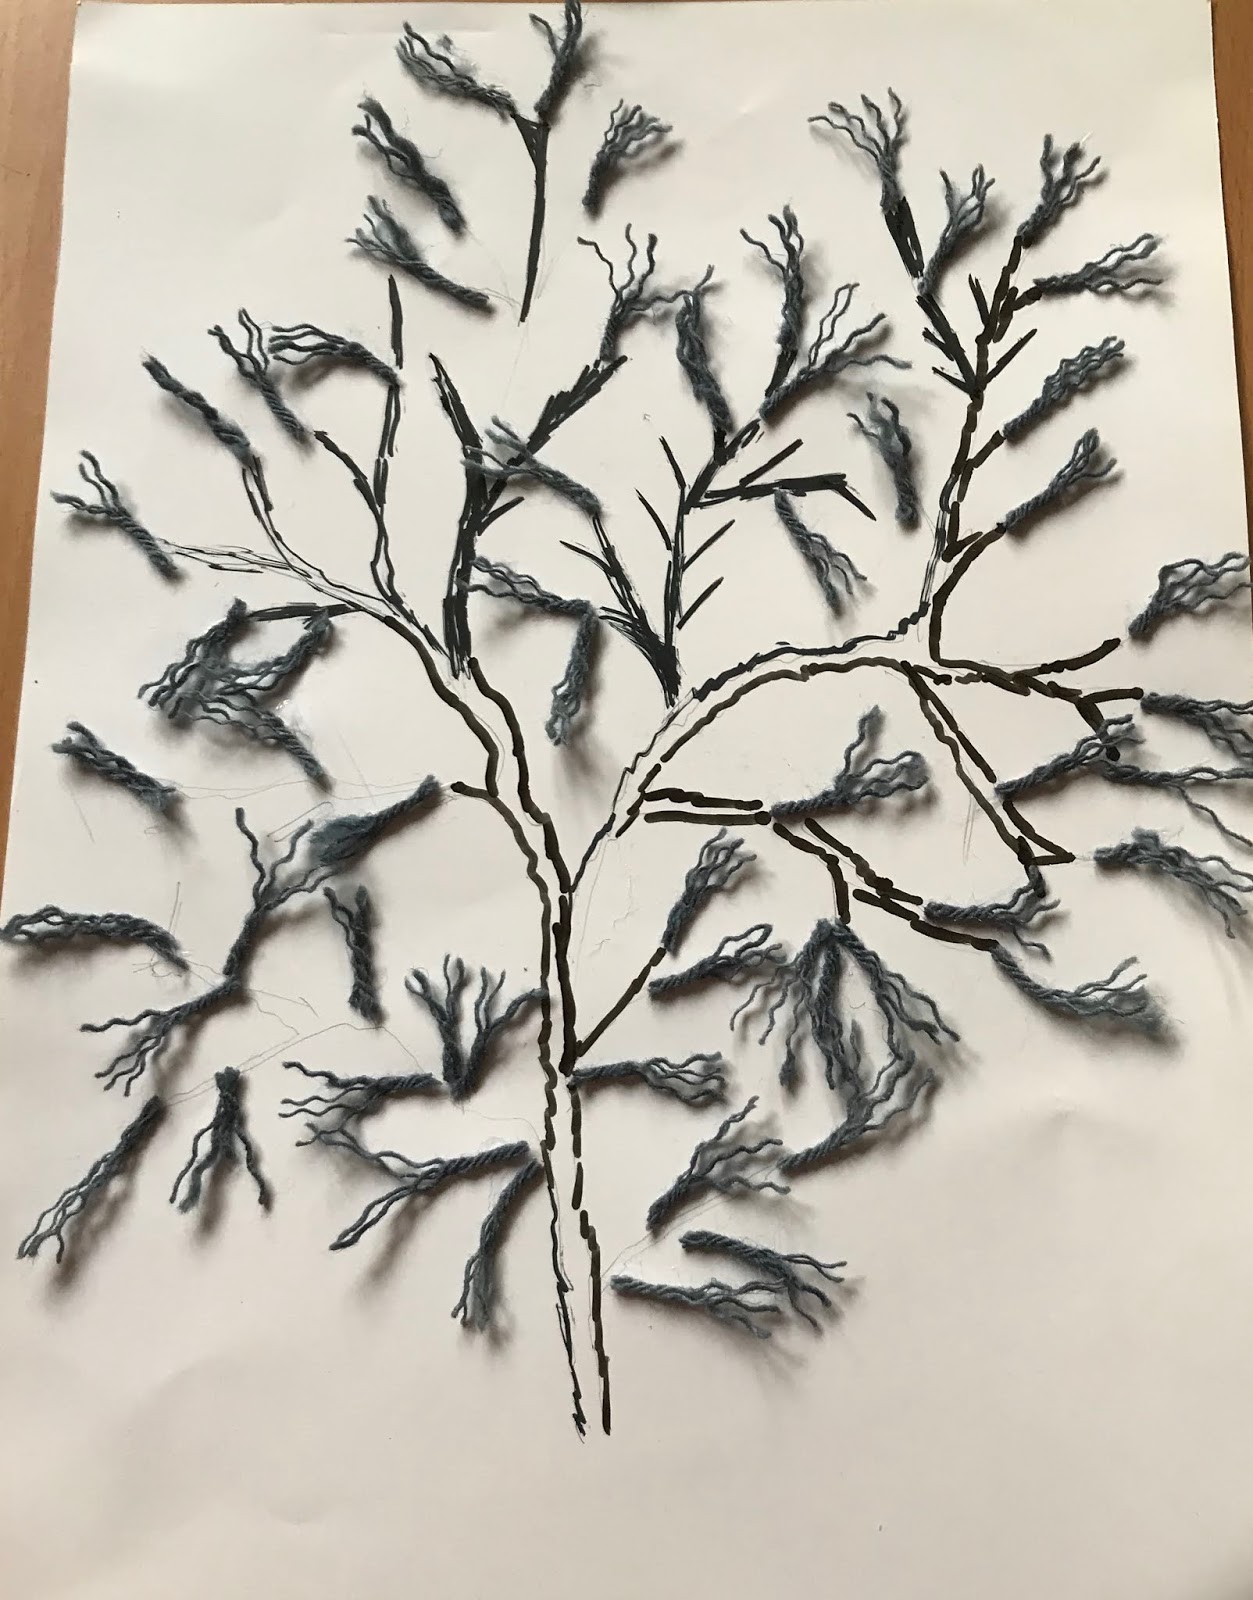
Take clay and roll it into small long strips (like thin ropes).
Bend each strip to form a drop-shaped loop or teardrop shape.
Pinch the ends so each loop looks neat.
Make many such loops of equal size.
Start placing clay loops around the glitter body:
First row: close to the body
Second row: slightly wider
Third row: forming a full fan shape
Ensure all loops point outward like real peacock feathers.
Apply glue under each clay feather to keep them fixed.
Adjust the spacing to make the design symmetrical.
Press lightly so the feathers hold their shape.
Check if all clay loops are firmly stuck.
Allow the clay to dry completely.
Add small clay details if desired (like tiny inner circles on feathers).